Total indicator runout (TIR) is a term often used in manufacturing, especially when dealing with rotating parts such as cutting tools, particularly endmills and drills. TIR is defined as the difference between the maximum and minimum values measured across an entire rotating surface about a reference axis.
Manufacturing high-quality, high-performance tools requires the Total Indicator Runout to be perfect or minimal for overall tool life and surface finish. Runout on blanks before grinding can be achieved by either spending a certain amount of time for work holding setup or alternatively, compensating the runout in software. The latest software update of ToolRoom has an option to apply complete tool runout compensation when needed.
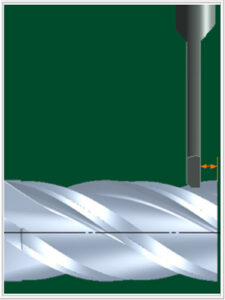 Runout creates uneven chip loads due to uneven contact on the workpiece. The result, as pictured above, is that some flutes get way too much load and wear fast while others get too little. This is not an optimal situation for endmills during machining. Not only do tools with runout have shorter tool life, but they also tend to be unbalanced and more prone to breaking. Additionally, they vibrate and cause chatter, increase spindle load and result in a bad surface finish on the workpiece.
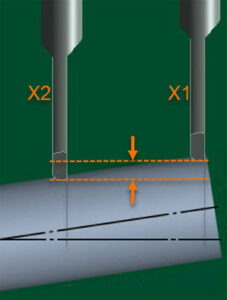
On the contrary, even cutting flutes results in longer tool life, better surface finish and accurate finished parts. Circular runout controls only a particular circular cross-section of an endmill, while total runout controls the entire surface of the endmill which includes the outer diameter and endface. There are two kinds of runout: Radial and Axial. Radial runout is when the axis of rotation is off-center from the main axis, but still parallel. Axial runout is when the axis of rotation is tilted to some degree from the main axis, meaning the axis of rotation is no longer parallel to the main axis.
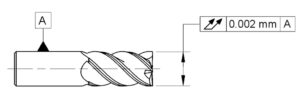 On an ANCA tool and cutter grinder, runout is measured by rotating the blank around the A-axis (headstock) and using the Renishaw touch probe. The latest update in ToolRoom RN34.1 release contains the total tool runout
 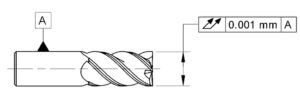 measurement and compensation operation in iGrind as an option. This is an addition to the existing axial runout compensation.
The runout measurement and compensation can be performed on a blank or a pre-formed blank. A pre-formed blank is a tool that has flutes ground, for example tools requiring re-sharpening. Endface compensation is used for axial runout by digitizing a single point close to the end of the tool. Only the endface operations are supported for this type of compensation.
Total runout or full compensation will measure and compensate radial and axial runout. This is mainly used while manufacturing and two points are digitized. One is near the end of the tool and the other at shank end. With the digitizing results, users are able to convert the grinding to the centerline of the blank rather than the centerline of the A-axis.
When an endmill is in rotation it is important that each tooth cuts at the exact same spot along the workpiece for longer tool life and efficient cutting. Every tool in the batch can be measured and compensated for runout to ensure the entire batch is within tolerances. Runout in drills and reamers will result in oversized holes. This can be avoided by using the runout compensation. The chart below shows the compensation test results.

It is important to note that accuracy starts with the quality of blank. Contrary to popular belief, carbide blanks can be out of round bent or tapered. Ensure that the blanks are checked for size and accuracy, cleaned, and chamfered at the insertion end. Blanks should be within 0.001mm (0.00004”) in straightness and 0.0005mm (0.00002”) in roundness to achieve the above accuracy.
 Manufacturing challenges due to runout is a persistent pain point for many precision tool manufacturers. This new feature addresses this problem and will give users the assurance they need to manufacture high-quality tools – ensuring that the hundredth endmill produced will be equally as good as the first.
The new complete tool runout measurement and compensation operation is now available as an option in the latest ToolRoom update for RN34.1 release. Customers will benefit from increase in productivity due to the reduced collet and collet adaptor setup time, and reduced scrap from zero rejections due to runout.
About ANCA:
ANCA is a market leading manufacturer of CNC grinding machines. It was founded in 1974 in Melbourne, Australia where the company still has its global headquarters. ANCA has offices in the UK, Germany, China, Thailand, India, Japan, Brazil and the USA as well as a comprehensive network of representatives and agents worldwide.
ANCA CNC grinders are used for manufacturing precision cutting tools and components across a diverse range of competitive industries including cutting tool manufacture, automotive, aerospace, electronics and medical.


