A common question asked of gear manufacturers by their potential customer is, “Is this gear strong enough for my application?” Without qualifiers, this question is ambiguous at best. The world record for deadlift is 536 kilograms (1,181 pounds). Does this make the record holder strong enough? Could he hold this weight for 10 minutes? How about for an hour? A gear needs to be able to withstand the applied torque of the desired service life of the gear. As such, the bending strength AND the surface durability need to be considered in order to answer the heretofore mentioned strength question.
All metals have a bending strength that is significantly stronger than their surface durability or bearing strength. To improve that surface durability and thereby improve the life of a gear, the gear can be heat-treated. There are several methods for heat-treating a gear.
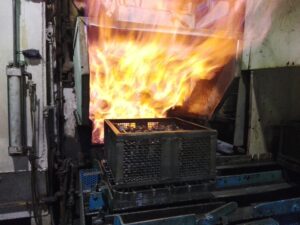 Flame hardening (Figure 1) is a common method for heat-treating gear teeth. It involves using a torch to heat specific areas of a gear, typically the gear teeth, to improve the surface durability. When applied manually, this method is prone to unsatisfactory results as the time spent heating each area will be different, the distance from which the flame is applied will vary and these two variations will cause different surface hardness across the gear. Even when the process is automated to remove these variations, the gear will still experience some dimensional distortion that will typically reduce the gear quality by one grade.
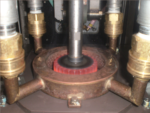
Induction hardening (Figure 2) is another common heat-treating method for gearing. In this process, the gear is surrounded by a coil. The coil is energized, thus creating alternating magnetic fields. These fields in turn generate eddy currents which heat the gear. This method is a fairly accurate way to harden all of the gear teeth to the same hardness and depth. However, it takes some skill and practice to determine the time that each individual gear configuration needs to obtain the desired hardness for a specific material. One of the drawbacks with induction hardening is that the areas immediately next to the gear teeth are also partially hardened. This limits the rework of areas near the teeth, after heat treating.
A third method for heat-treating gearing is to carburize the gear (Figure 3 and Figure 4). Carburization is the process of placing the gear into an oven with added carbon and heating the oven to several hundred degrees Celsius for an extended period of time. This process allows the added carbon to penetrate into the molecular structure of the gear. This added carbon causes a skin of hardened material (also known as a case) to form on the outermost layer of the gear.
This case makes the gear unable to be re-machined after heattreating unless carbide tooling or wire EDM methods are employed. As such, it is desirable to perform all machining operations prior to carburization. Similar to induction hardening, great skill is needed to obtain the desired results when carburizing.
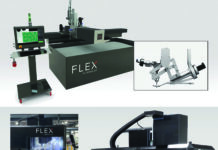
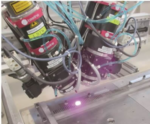
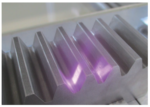
The newest method of heat-treating is laser hardening (Figures 5 a and b). This method, as the name suggests, uses light energy to rapidly heat small sections of a gear. It has several advantages over all other methods of heat treating. The first advantage is that it can be used in very small areas and does not affect nearby areas. Additionally, since it is operated by a CNC, the amount of energy applied to each section is identical and the hardness depth can be limited. Since the pulse of light is applied very quickly, the gear does not have an opportunity to heat up and therefore, there is no degradation in gear quality.
All heat-treating methods increase the surface durability, but some also reduce the bending strength as the material becomes brittle after heat-treating. Some examples of the benefits of heat treating are as follows:
• A: Module 2, 15 tooth, 1045 carbon steel spur gear with a 20mm face width, has an allowable bending strength torque of 29.6 Nm and a surface durability of 1.48 Nm. When induction hardened to HRc 45-55, the allowable bending strength torque remains at 29.6 Nm but the surface durability increases to 10.5 Nm. This is a 9x increase in surface durability.
• B: Module 2, 25 tooth, 1045 carbon steel spur gear with a 20mm face width, has an allowable bending strength torque of 63.3 Nm and a surface durability of 4.64 Nm. When induction hardened to HRc 45-55, the allowable bending strength torque decreases to 52.7 Nm, but the surface durability increases to 27.0 Nm. This is a 5.8x increase in surface durability and a 16 percent decrease in bending strength.
• C: Module 2, 40 tooth, 1045 carbon steel spur gear with a 20mm face width, has an allowable bending strength torque of 118 Nm and a surface durability of 12.5 Nm. When induction hardened to HRc 45-55, the allowable bending strength torque decreases to 98.3 Nm, but the surface durability increases to 72.1 Nm. This is a 5.7x increase in surface durability and a 17 percent decrease in bending strength.
• D: Module 2, 1045 carbon steel gear rack with a 20mm face width, has an allowable bending strength of 3830 N and a surface durability of 775 N. When induction hardened to HRc 45-55, the allowable bending strength torque decreases to 3480 N, but the surface durability increases to 2000 N. This is a 2.5x increase in surface durability and a 9 percent decrease in bending strength. However, if laser hardened to HRc 55-65, the bending strength remains 3830 N and the surface durability increases to 1730 N. This is a 2.2x increase in surface durability without any of the distortion or decrease in bending strength that occurs with other methods.
These are some of the many ways that you can heat-treat a gear to improve the surface durability. Each method has its advantages and disadvantages, but laser hardening is the most economical method for small batch hardening.


