According to the Automated Imaging Association (AIA), machine vision encompasses all industrial and non-industrial applications in which a combination of hardware and software provide operational guidance to devices in the execution of their functions based on the capture and processing of images. Though industrial computer vision uses many of the same algorithms and approaches as academic/educational and governmental/military applications of computer vision, constraints are different.
Industrial vision systems demand greater robustness, reliability, and stability compared with an academic/educational vision system and typically cost much less than those used in governmental/military applications. Therefore, industrial machine vision implies low cost, acceptable accuracy, high robustness, high reliability, and high mechanical, and temperature stability.
Machine vision systems rely on digital sensors protected inside industrial cameras with specialized optics to acquire images, so that computer hardware and software can process, analyze, and measure various characteristics for decision making.
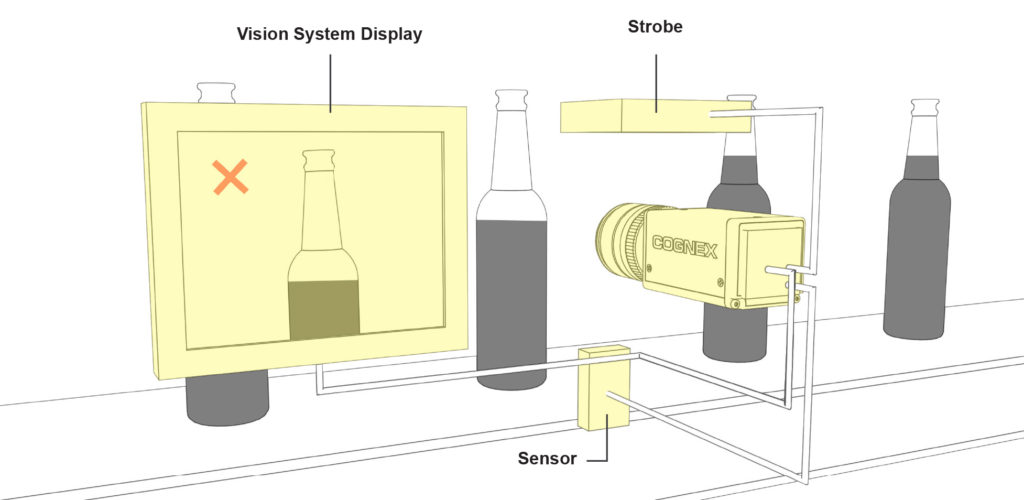 As an example, consider a fill-level inspection system at a brewery (Figure 1). Each bottle of beer passes through an inspection sensor, which triggers a vision system to flash a strobe light and take a picture of the bottle. After acquiring the image and storing it in memory, vision software processes or analyzes it and issues a pass-fail response based on the fill level of the bottle. If the system detects an improperly filled bottle—a fail—it signals a diverter to reject the bottle. An operator can view rejected bottles and ongoing process statistics on a display.
Machine vision systems can also perform objective measurements, such as determining a spark plug gap or providing location information that guides a robot to align parts in a manufacturing process.
 Benefits Of Machine Vision
Where human vision is best for qualitative interpretation of a complex, unstructured scene, machine vision excels at quantitative measurement of a structured scene because of its speed, accuracy, and repeatability. For example, on a production line, a machine vision system can inspect hundreds, or even thousands, of parts per minute. A machine vision system built around the right camera resolution and optics can easily inspect object details too small to be seen by the human eye.
In removing physical contact between a test system and the parts being tested, machine vision prevents part damage and eliminates the maintenance time and costs associated with wear and tear on mechanical components. Machine vision brings additional safety and operational benefits by reducing human involvement in a manufacturing process.
Moreover, it prevents human contamination of clean rooms and protects human workers from hazardous environments.
Machine Vision Applications
Typically the first step in any machine vision application, whether the simplest assembly verification or a complex 3D robotic bin-picking, is for pattern matching technology
to find the object or feature of interest within the camera’s field of view. Locating the object of interest often determines success or failure. If the pattern matching software tools cannot precisely locate the part within the image, then it cannot guide, identify, inspect, count, or measure the part.
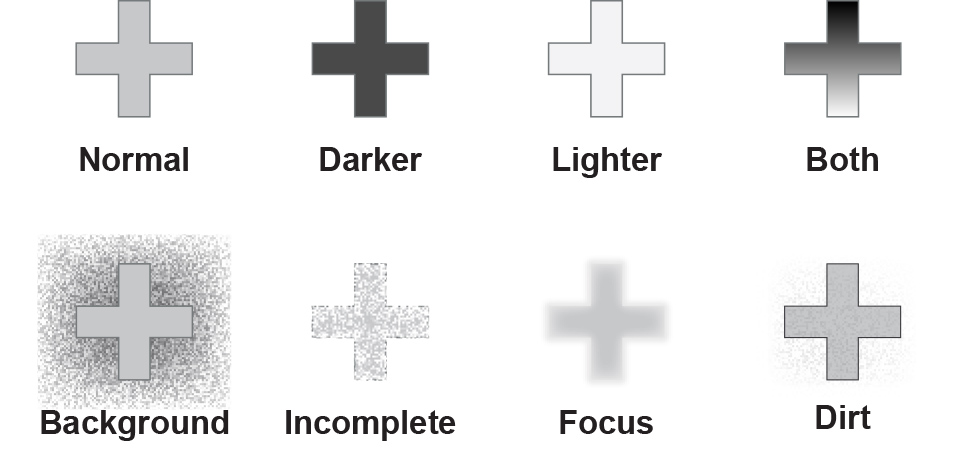
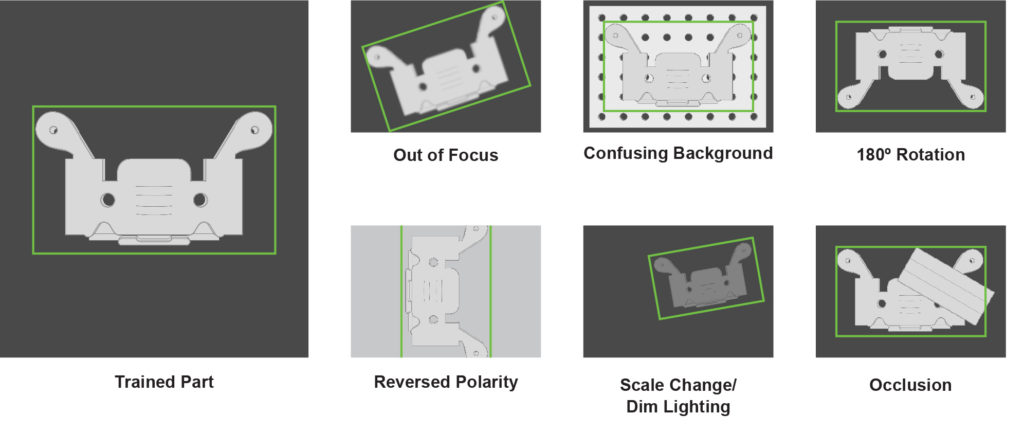
 While finding, a part sounds simple, differences in its appearance in actual production environments can make that step extremely challenging. Although vision systems are trained to recognize parts based on patterns, even the most tightly controlled processes allow some variability in a part’s appearance.
To achieve accurate, reliable, and repeatable results, a vision system’s part location tools must include enough intelligence to quickly and accurately compare training patterns to the actual objects (pattern matching) moving down a production line.
Part location is the critical first step in the four major categories of machine vision applications. The categories are guidance, identification, gauging, and inspection, which can be remembered by the acronym (GIGI).
 Guidance
Guidance may be done for several reasons. First, machine vision systems can locate the position and orientation of a part, compare it to a specified tolerance, and ensure it’s at the correct angle to verify proper assembly. Next, guidance can be used to report the location and orientation of a part in 2D or 3D space to a robot or machine controller, allowing the robot to locate the part or the machine to align the part. Machine vision guidance achieves far greater speed and accuracy than manual positioning in tasks such as arranging parts on or off pallets, packaging parts off a conveyor belt, finding and aligning parts for assembly with other components, placing parts on a work shelf, or removing parts from bins.
Guidance can also be used for alignment to other machine vision tools. This is a very powerful feature of machine vision because parts may be presented to the camera in unknown orientations during production. By locating the part and then aligning the other machine vision tools to it, machine vision enables automatic tool fixturing. This involves locating key features on a part to enable precise positioning of caliper, blob, edge, or other vision software tools so that they correctly interact with the part. This approach enables manufacturers to build multiple products on the same production line and reduces the need for expensive hard tooling to maintain part position during inspection.
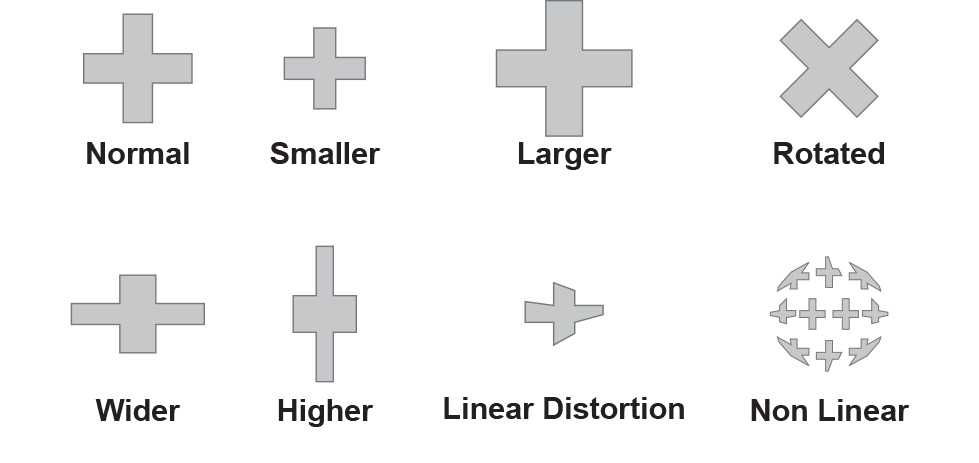
 Sometimes guidance requires geometric pattern matching. Pattern matching tools must tolerate large variations in contrast and lighting, as well as changes in scale, rotation, and other factors while finding the part reliably every time. This is because location information obtained by pattern matching enables the alignment of other machine vision software tools.
Identification
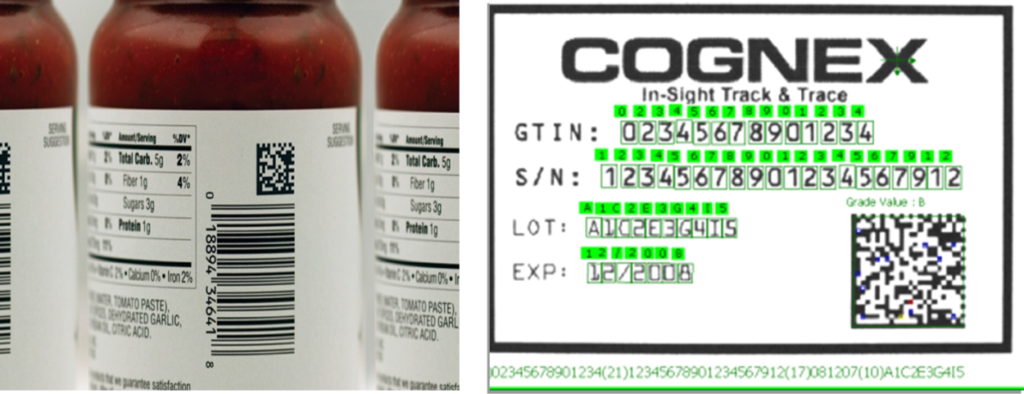
DPM applications mark a code or character string directly on to the part. Manufacturers in all industries commonly use this technique for error-proofing, enabling efficient containment strategies, monitoring process control and quality-control metrics, and quantifying problematic areas in a plant such as bottlenecks. Traceability by direct part marking improves asset tracking and part authenticity verification. It also provides unit- level data to drive superior technical support and warranty repair service by documenting the genealogy of the parts in a sub-assembly that make up the finished product.
 Conventional barcodes have gained wide acceptance for retail checkout and inventory control. Traceability information, however, requires more data than can fit in a standard barcode. To increase the data capacity, companies developed 2-D codes, such as Data Matrix, which can store more information, including manufacturer, product identification, lot number, and even a unique serial number for virtually any finished good.
Gauging
A machine vision system for gauging calculates the distances between two or more points or geometrical locations on an object and determines whether these measurements meet specifications. If not, the vision system sends a fail signal to the machine controller, triggering a reject mechanism that ejects the object from the line.
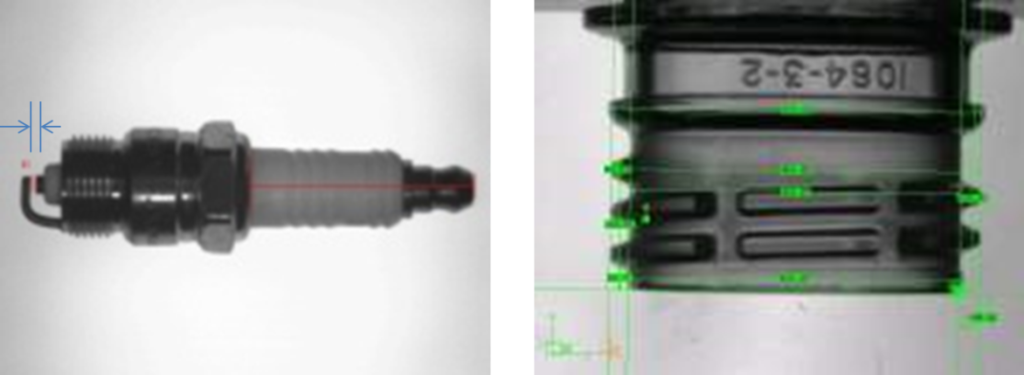 In practice, a fixed-mount camera captures images of parts as they pass the camera’s field of view and the system uses software to calculate distances between various points in the image. Because many machine vision systems can measure object features to within 0.0254 millimeters, they address many applications traditionally handled by contact gauging.
Inspection
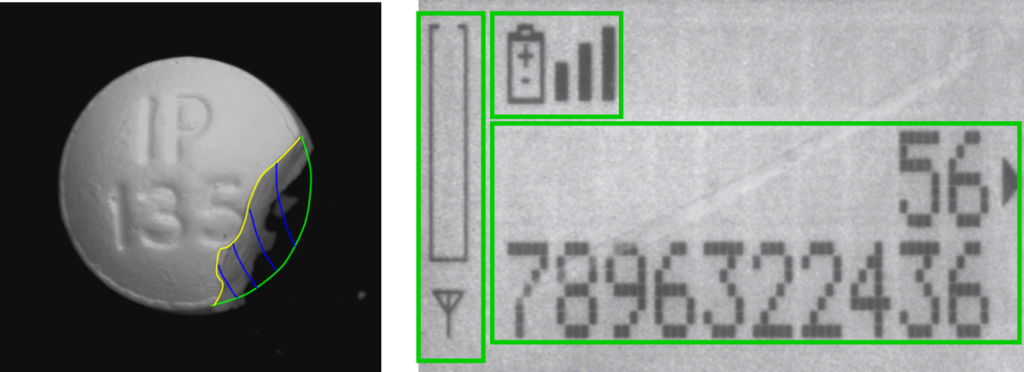
A machine vision system for inspection detects defects, contaminants, functional flaws, and other irregularities in manufactured products. Examples include inspecting tablets of medicine for flaws, displays to verify icons or confirm pixel presence, or touch screens to measure the level of backlight contrast. Machine vision can also inspect products for completeness, such as ensuring a match between product and package in the food and pharmaceutical industries, and checking safety seals, caps, and rings on bottles.
 Automatic Extraction
Machine vision is the automatic extraction of information from digital images for process or quality control. Most manufacturers use automated machine vision instead of human inspectors because it is better suited to repetitive inspection tasks. It is faster, more objective, and works continuously. Machine vision can inspect hundreds or even thousands of parts per minute, and provides more consistent and reliable inspection results 24 hours a day, 7 days a week.
Measurement, counting, location, and decoding are some of the most common applications for machine vision in manufacturing today. By reducing defects, increasing yield, facilitating compliance with regulations and tracking parts with machine vision, manufacturers can save money and increase profitability.

