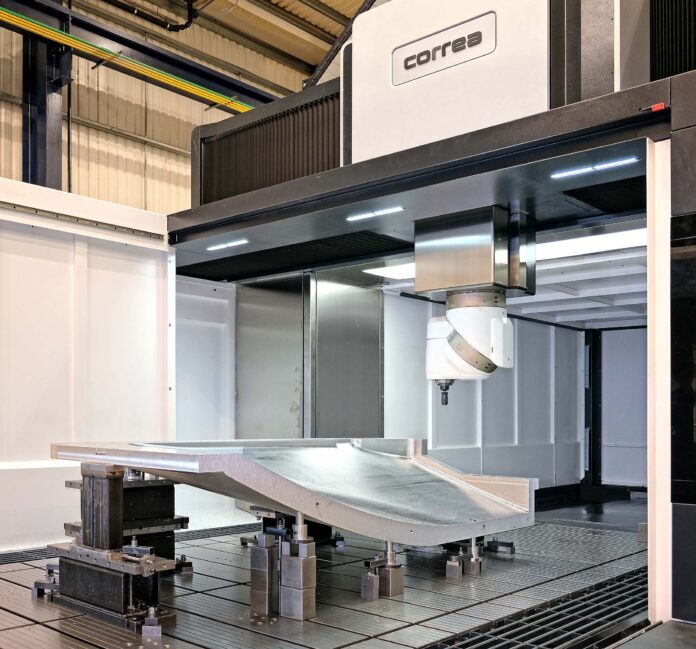
Stalybridge-based engineering company Park Engineering has significantly increased the size of parts it can machine and subsequently measure on a coordinate measuring machine (CMM). It follows the installation at the start of 2022 of two new machines, a Spanish-built Correa Fox 50 5-axis machining centre having a 5.0 x 3.25 x 1.6 m working envelope, nearly 16% larger than the previous largest machine, and an ALTERA M 30.20.15 CMM with 3.0 x 2.0 x 1.5 m axis travels built by LK Metrology in Castle Donnington, UK. Compared with the largest of three LK machines previously operated by Park Engineering, it offers twice the measuring volume.
 A member of the tooling division within the Hyde Group in the North of England, Park Engineering specialises in the design, manufacture, assembly and certification of tooling jigs and fixtures for the aerospace, nuclear, defence and automotive sectors, so the company is accustomed to dealing with large components. It also provides a subcontract machining service. When looking to invest in new technology to offer even larger capacity, there was a desire to inspect the bigger parts on a ‘gold standard’ CMM platform rather than rely on portable measuring systems, which may have a larger measuring volume but are usually lower in accuracy.
Park Engineering first encountered LK in the mid-1990s when buying a pre-owned, 10 year old, 2.5 x 1.5 x 1.2m capacity G80K. The performance of the machine coupled with the good back-up provided by LK in maintaining the equipment’s mechanics and its ability to provide control and software upgrades prompted the purchase a few years later of another pre-owned LK CMM – a 2.0 x 1.0 x 0.8m G80C. Both were the mainstay of jig, fixture and tooling inspection not only for the company’s own production but also for a growing subcontract customer measurement service.
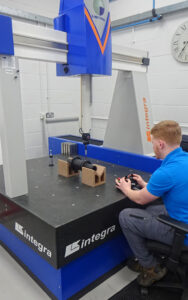
The metrology department continued in this vein, adding a new LK INTEGRA 10.10.8 with a measuring volume of 1.0 x 1.0 x 0.8m in 2007 for quality control of smaller, tight-tolerance aerospace parts and tooling. The machine was purchased through Metris, which owned LK at the time, although the company has been independent again since 2018.
All of Park Engineering’s activities were at the time conducted at a factory in Reddish, Stockport, but the company relocated in the second half of 2021 to larger premises owned by the Hyde Group in Stalybridge, Cheshire. In the process, the company decided to upgrade its machining and measuring technologies and capacities, which included the retirement of the two older CMMs and replacing them with a new, larger machine. Quality manager Will Reeves looked at other potential CMM suppliers, which is normal practice within the group, but saw no reason to change due to his long-term experience of the reliability of LK machines and the excellent service provided by the LK team.
Reeves said, “In fact, the process only served to underscore LK’s reputation and reaffirm the trust we have in them as a preferred supplier. The fact that it is a UK manufacturer is an added benefit, as it means that the in-depth engineering expertise in the factory is local to us should it be required.”
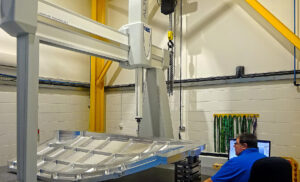 Discussions with LK soon identified the ideal size of the new CMM to be installed, the ALTERA M 30.20.15. Mr Reeves enthused, “The increase in speed and accuracy of the ALTERA M, which is around six times faster and 216% more accurate than the oldest of our previous CMMs, was a great selling point but we were also delighted to have a larger capacity CMM with a smaller overall footprint. It is down to the top class LK machine design, incorporating the best of modern materials and technology. ”
In day-to-day operation, the ALTERA M CMM supports the inspection of large parts with drawing tolerances of typically ± 50µm, but is sufficiently accurate to measure smaller parts down in the 10 µm region. Irrespective of tolerances, LK’s software application CAMIO with its user-friendly operator interface allows CNC programs to be generated either online or off-line for the inspection of batch quantities, further reducing inspection time and cost, especially when CAD models are available.
Mr Reeves commented, “Across the broad spectrum of work packages, we have access to CAD models approximately 50-60% of the time, with the remainder being work to print. However, the provision of CAD models is something we are always encouraging our customers to provide, as it minimises the risk of incorrect data being entered due to human error during the programming process.”
He concluded, “LK’s CAMIO software also saves time by automatically generating comprehensive reports that we are able to send to our customers with inspected components. The professional appearance of the documentation adds to the perceived professionalism of the service we provide.”
“The new metrology platform is significantly more productive than our old G80K and the G80C put together, as well as being more accurate. Along with the INTEGRA, it puts Park Engineering in a good position to provide metrology support not only to our own production but also to external customers that want subcontract measurement support now and into the long-term future.”
About LK Metrology
LK Metrology is renowned for innovative metrology solutions and services. The company’s products, including coordinate measuring machines (CMM), portable measuring arms and metrology software, are used worldwide to control and improve the quality of manufactured components. Its precision technology underpins the process chain from design, development, production and assembly through to quality assurance in global industries such as automotive, aerospace, defence, motorsport, energy, medical and contract inspection.
Established in England in 1963, LK Metrology has an impressive heritage in metrology dating back to the birth of CMM technology. Founded by CMM pioneer Norman Key and his father-in-law Jim Lowther, LK Metrology is credited with many of the CMM industry’s firsts including the first bridge-type design, first OEM to integrate computers, first to use a touch trigger probe, first to develop inspection software, first to use all air bearings and granite guideways, first to use carbon fibre composite spindles, first to use microprocessor-controlled drive systems, first to produce a truly thermally stable CMM and first to produce a high-accuracy horizontal-spindle CMM.
In 2018, LK Metrology was relaunched as an independent CMM manufacturer after several years as a division of Nikon Metrology. Headquartered in the UK, LK’s CMM development and production are at the company’s facility in Castle Donington. Sales and support offices are located in the UK, North America, Belgium, France, Germany, Italy and China, supplemented by a worldwide distributor network.

